Next-Generation Ceramics: Unlocking Superior Properties for Industry
The Engineer Who Chose Wrong: A Story of Thermal Shock
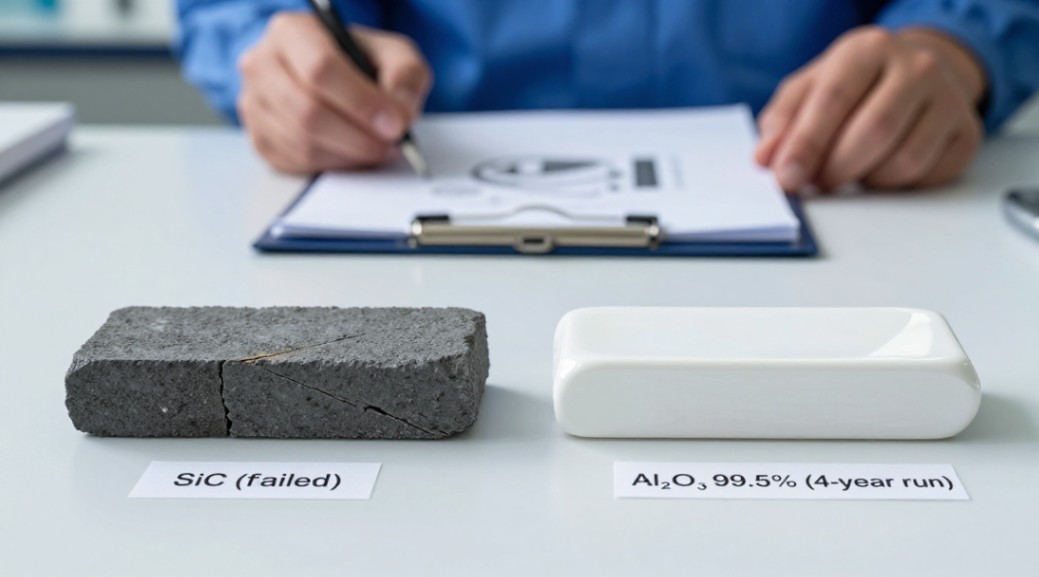
I still recall a phone call from a young engineer in 2008. His team had spent six months designing a high-temperature furnace bushing. They specified a silicon carbide ceramic. It failed catastrophically after four thermal cycles. The client was furious. The engineer was desperate. When I reviewed the design, the root cause was clear: they needed electrical insulation, not just heat resistance. Silicon carbide is a semiconductor. It leaked current at 900°C. The solution was an aluminum oxide ceramic with 99.5% purity. We swapped the material, kept the same geometry, and the bushing ran for four years without failure. That lesson stuck with me. You cannot pick a ceramic based on one property alone. You must follow a process. This article outlines that process, step by step, so you don’t learn the hard way.
Step 1: Define Your Operating Environment Before You Choose a Grade
Before you even look at a data sheet, stop. Write down three things: maximum temperature, chemical exposure, and mechanical load. This is your triage. Aluminum oxide ceramic excels in oxidizing atmospheres up to 1750°C, but its strength drops significantly above 1000°C. If you need thermal shock resistance, do not default to alumina. It has a low thermal conductivity relative to aluminum nitride ceramic or silicon carbide ceramic. For rapid heating cycles, consider reaction-sintered silicon carbide ceramics or pressureless sintered silicon carbide ceramics instead. For chemical environments, aluminum oxide ceramic resists most acids and alkalis, but not hydrofluoric acid or hot phosphoric acid. If your line uses those, you need silicon nitride ceramic or a special coating for boron nitride ceramic crucibles. Do not skip this step. I have seen engineers burn millions on the wrong material because they assumed alumina was universal. It is not.
Step 2: Select Your Purity Grade Based on Performance, Not Price
This is where most people make their first mistake. They buy 96% alumina because it is cheap. Then they wonder why the part wears out in three months. Aluminum oxide ceramic comes in three common purity levels: 96%, 99.5%, and 99.9%. Each has a distinct job. 96% alumina contains a glassy phase, usually silica and calcia. This makes it easier to sinter and cheaper to produce. Use it for low-stress insulators, thermostat components, or non-critical wear parts. But do not use it for medical implants. The glassy phase can leach ions. For those, you need 99.5% or higher. 99.5% alumina is the workhorse. It offers high density, excellent wear resistance, and reliable electrical insulation. 99.9% alumina is for optical or extreme wear applications, like translucent high-pressure sodium lamp tubes or watch components. The cost jumps 3x from 96% to 99.9%. The performance does not always scale linearly. Test your specific load case. I always recommend prototyping with the next grade up. If 99.5% works, you can often downgrade to 96% for production. But start from safety.
Step 3: Match the Manufacturing Method to Your Geometry
You cannot make a complex internal channel part with dry pressing. It is physically impossible. Aluminum oxide ceramic manufacturing follows three primary routes, and each dictates your design constraints. First, dry pressing. This is for simple shapes: discs, blocks, and rings. It is fast and cheap, but you lose density near corners. Do not use dry pressing for parts with aspect ratios above 3:1. Second, isostatic pressing. This gives uniform density throughout. Use it for long rods, tubes, or large blanks. The trade-off is machining cost. Isopressed parts almost always require diamond grinding after sintering. Third, sintering. This is the final step, but the method matters. Pressureless sintering works for most aluminum oxide ceramic grades. Hot pressing gives higher density but limits shape complexity. For recrystallized silicon carbide ceramics, you need a different sintering atmosphere entirely. If you need a complex shape with high precision, look at silicon carbide-bonded silicon nitride ceramics as an alternative. They can be machined in the green state more easily. Do not force a manufacturing method. Let the geometry guide you.
Step 4: Understand the Trade-Off Between Hardness and Toughness
Here is the hard truth about aluminium oxide ceramic. It is very hard. On the Mohs scale, it is 9, just below diamond. But it is brittle. Its fracture toughness hovers around 3 to 4 MPa·m1/2. For comparison, zirconia ceramic can reach 10 MPa·m1/2. If your application involves high impact or cyclic mechanical loading, pure alumina will crack. Do not expect it to bend. It won’t. I have seen engineers try to press-fit an alumina bushing into a steel sleeve. The bushing shattered. It has zero ductility. If you need toughness, you have two strategies. First, use a zirconia-toughened alumina (ZTA). This composite adds 15-20% zirconia to the matrix. The zirconia particles undergo a phase transformation under stress, absorbing energy. This doubles the toughness. Second, switch materials entirely. Consider boron carbide ceramic for extreme hardness combined with lower density, or mullite ceramic for better thermal shock resistance. But if you need electrical insulation and wear resistance, ZTA is often the sweet spot. Just know that adding zirconia increases cost and reduces high-temperature stability above 800°C. There are no free lunches in ceramics.
Step 5: Verify Biocompatibility Requirements for Medical Applications
Aluminium oxide ceramic has a long history in medicine. It is bioinert. The body does not react to it. This makes it ideal for hip joint heads, dental abutments, and bone screws. But not all grades are equal. For medical implants, you must use high-purity, high-density alumina, typically 99.9% with a grain size below 2 microns. The ISO 6474 standard specifies this. I have seen companies try to use 96% alumina for a dental implant. The material corroded in the oral environment over five years. The glassy phase dissolved. The patient needed revision surgery. Do not cut corners here. If you are designing a medical device, you must also consider the wear couple. Alumina-on-alumina hip joints have low wear rates, but they can squeak. That is a real patient complaint. Some surgeons now prefer alumina-on-polyethylene to avoid noise. Silicon nitride ceramic is also gaining traction for spinal implants due to its antibacterial surface. But for pure biocompatibility and long-term stability, aluminum oxide ceramic remains the gold standard. Just follow the standards. No exceptions.
Step 6: Design for the Sintering Shrinkage
This is the most common cause of dimensional failure. Aluminum oxide ceramic shrinks 15-20% during sintering. The exact amount depends on your powder, binder, and firing schedule. You cannot guess this. You must measure it experimentally. I always advise running a test bar with every new batch of powder. Dry press it, measure it green, fire it, measure it again. Calculate the shrinkage factor. Then apply that factor to your mold design. But be careful: shrinkage is not always isotropic. For dry-pressed parts, shrinkage is often higher in the pressing direction. For isostatically pressed parts, it is more uniform. If you need a tight tolerance, ±0.1% of the fired dimension, you must diamond grind after sintering. This adds cost but gives precision. For quartz ceramic or mullite ceramic, shrinkage is lower, around 5-10%, but the properties differ. Do not design a part for alumina and then switch to another ceramic without recalculating your tooling. I have seen a 5 mm tolerance window turn into a 15 mm mismatch because an engineer forgot to update the shrinkage factor. Measure twice, fire once.
Step 7: Install and Bond with Care
You have selected the right grade. You have manufactured it correctly. Now you must install it. This is where many good parts die. Aluminum oxide ceramic is brittle. It does not tolerate point loads. When you mount an alumina component, use a compliant interface. A thin layer of silicone rubber, a PTFE gasket, or a spring-loaded holder. Do not clamp it directly with steel screws. The coefficient of thermal expansion of alumina is about 8 x 10⁻⁶/°C. Steel is about 12 x 10-6/°C. If you heat the assembly, the steel expands more and crushes the ceramic. For high-temperature bonding, use an alumina-based cement. For lower temperatures, epoxy works. But avoid cyanoacrylates. They create brittle joints. If you are bonding aluminum oxide ceramic to boron nitride ceramic, the thermal expansion mismatch is severe. BN has a very low expansion. Use a thick, flexible adhesive layer. For special coating for boron nitride ceramic crucibles, the coating is often applied as a slurry and fired in place. Follow the manufacturer’s cure schedule exactly. I have seen a rushed cooldown crack a crucible because the thermal gradient exceeded 50°C per minute. Patience is a virtue with ceramics.
Step 8: Inspect for Hidden Flaws
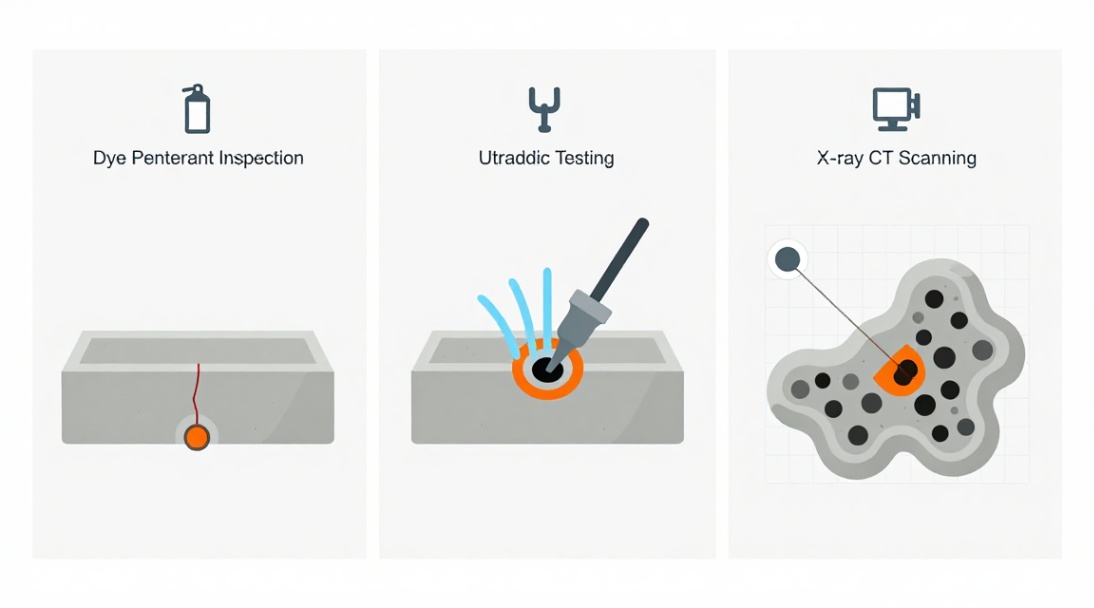
You cannot trust a ceramic part just because it looks good. Aluminum oxide ceramic can have internal flaws invisible to the naked eye. Microcracks from grinding, delamination from pressing, or pores from incomplete sintering. These are failure initiation sites. For critical applications, you must perform non-destructive testing. Dye penetrant inspection works for surface cracks. Ultrasonic testing catches internal voids above 0.5 mm. X-ray CT scanning is best for complex geometries. I specify a 100% ultrasonic inspection for any alumina part used in a vacuum or high-pressure environment. The cost is about 5-10% of the part value. It is worth it. A single void can cause a catastrophic failure. I recall a case in a semiconductor etch chamber: a 99.5% alumina ring looked perfect, but a 0.2 mm pore near the edge caused arcing. The chamber lost vacuum. The repair cost $50,000. The inspection would have cost $20. Do not skip this step. For silicon carbide ceramic or silicon nitride ceramic, the same principle applies. Trust but verify.
Your Next Move: Test, Don’t Assume
I have given you the sequence. Define your environment. Select your grade. Match the method. Understand the toughness. Verify biocompatibility. Design for shrinkage. Install with care. Inspect for flaws. This is not optional reading. It is a technical roadmap. If you follow these steps, you will avoid the expensive failures I have witnessed over two decades. Your next step is not to buy material. It is to test. Get a sample of the aluminum oxide ceramic grade you think you need. Run it through your actual process conditions. Measure the wear. Cheque the insulation. See if it survives the thermal cycle. Only then should you commit to a production run. Ceramics do not forgive assumptions. They reveal them. Be the engineer who tests first. Your budget, your timeline, and your reputation depend on it.
Suppiler
Synthetic-chemical focus on the research and development, production and sales of ceramic products, serving the electronics, ceramics, chemical and other industries. Since its establishment in 2015, the company has been committed to providing customers with the best products and services, and has become a leader in the industry through continuous technological innovation and strict quality management.
Our products includes but not limited to Aluminum Nitride, Aluminum Oxide, Boron Carbide, Boron Nitride, Ceramic Crucible, ect. If you are interested in any type of these, please feel free to contact us.